In a recent client project I integrated a product order form with the fantastic Gravity Forms plugin. The form needed to be populated with data which it recieved from custom posts.
One of the many good things about Gravity Forms is that you can populate form fields dynamically. You can link from your post to the form and send data with it.

If you don’t know how to populate a field dynamically and send data to it, here you can learn how to do it.
But besides populating a form’s product field I also wanted to populate another field with a dynamic product image.

In Gravity Forms you can include an image by choosing a HTML field and then adding the image tag: <img src="path-to-image" alt="" />.
However that only lets you generate static image content. Unlike many other fields the HTML field cannot be populated dynamically.
Oh, bummer. But with the help of some Jquery I was able to add a dynamic image to the form. Here is how did it.
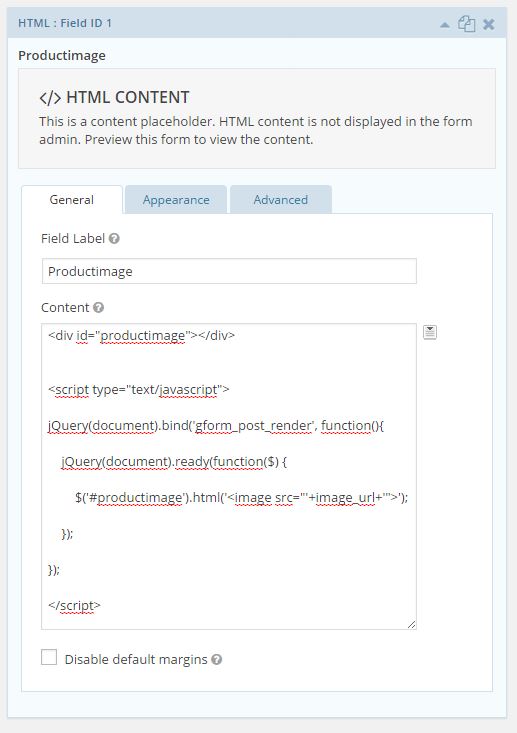
1. Create a HTML Gravity form field and add <div id="productimage"></div>.
This container will take our productimage later on.

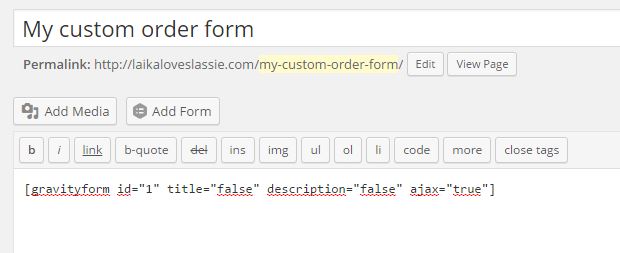
2. Create a page in which you include the form you just created and link to it in your post.
Make sure that you activate ajax in the form.

Then write another post/page/custom-post with a thumbnail image and add a link that points to the form:
<a hef="http://laikaloveslassie.com/my-custom-order-form/>Order Product</a>
3. Create an external Javascript file and enqueue it.
Since I knew I had more Jquery maniputions to do on my form I created in the js subfolder of my theme a blank javascript file named gf-scripts.js. Then I enqueued the file in my WordPress functions.php.
You can skip this step and jump to step 4 if you just wanna add an image to your form and don’t need more manipulations. Check the follow up further down in Step 5.
add_action( 'gform_enqueue_scripts', 'enqueue_custom_gf_script', 10, 2 );

function enqueue_gf_custom_script( $form, $is_ajax ) {

    if ( $is_ajax ) {

         wp_enqueue_script( 'custom_gf_script', get_template_directory_uri() . '/js/gf-scripts.js' );

    }

}
This code loads the external javascript file into the header (wp_head) of the website.
Notice that for Gravity Forms the file will not be enqueued with wp_enqueue_scripts but with the Gravity Forms specific gform_enqueue_scripts.
4. Setting up referrer content to get my post_thumbnail image.
Now we tell WordPress to add some code in the header above the newly created custom Gravity Forms Javascript file and all other content. This code is responsible to send my post thumbnail image to the form. I did this with the help of some PHP and a little Javascript.
I integrate the code in the header with the wp_head function in the themes’ functions.php and call it before my external javascript file.
add_action('wp_head','php_var_to_javascript', 1);
// call the function before calling the custom gf-script by integrating it on position 1.

function php_var_to_javascript () {
// create the function

global $post;
// since we call the post outside the loop

$ID = url_to_postid(wp_get_referer());
// get the ID of the referring post

$thumb = wp_get_attachment_image_src( get_post_thumbnail_id($ID), 'thumbnail' );
// get the thumbnail of the referring post

$image_url = $thumb['0'];
// get the url of the thumnail image

$output="<script>var image_url = '$image_url';</script>";
// transform the PHP variable into a Javascript variable

echo $output;
// echo into the header

}
5. Manipulate the productimage container
In the last step we add some Jquery to our external gf-scripts.js. This code calls the image url previously defined in our header (Step 4) and manipulates the image container with the ID #productimage in the Gravity Form HTML block we made in step 1.
//.....

/*----------------------- Add Image to Gravity Form ---------------------*/

jQuery(document).bind('gform_post_render', function(){

// code to trigger on AJAX form render, it fires each time the form is loaded

    jQuery(document).ready(function($) {

    // When the document is ready

        $('#productimage').html('<image src="'+image_url+'">');

    });

});

// .........
Remark: If you don’t wanna add an external custom script you can call the script directly in your HTML block like this and skip Step 3.

That’s it. In the end it is a rather simple and straight forward process.
If you enjoyed the post or have useful suggestions, please leave a comment.

